
Welcome to the Lazy Photons image gallery! All of the images here are my original astrophotography, with most captured at Lazy Photons Observatory under California's Bortle 5 sky conditions.
Click on an image to inspect and see acquisition details. Full-res downloads are available, and most targets link to the registered and calibrated subframes so you can try processing the raw data yourself. If you do, I would love to see your result!
Equatorial Sky Atlas
Scroll to zoom • Drag to pan • Hover targets to preview

Cosmic Compendium
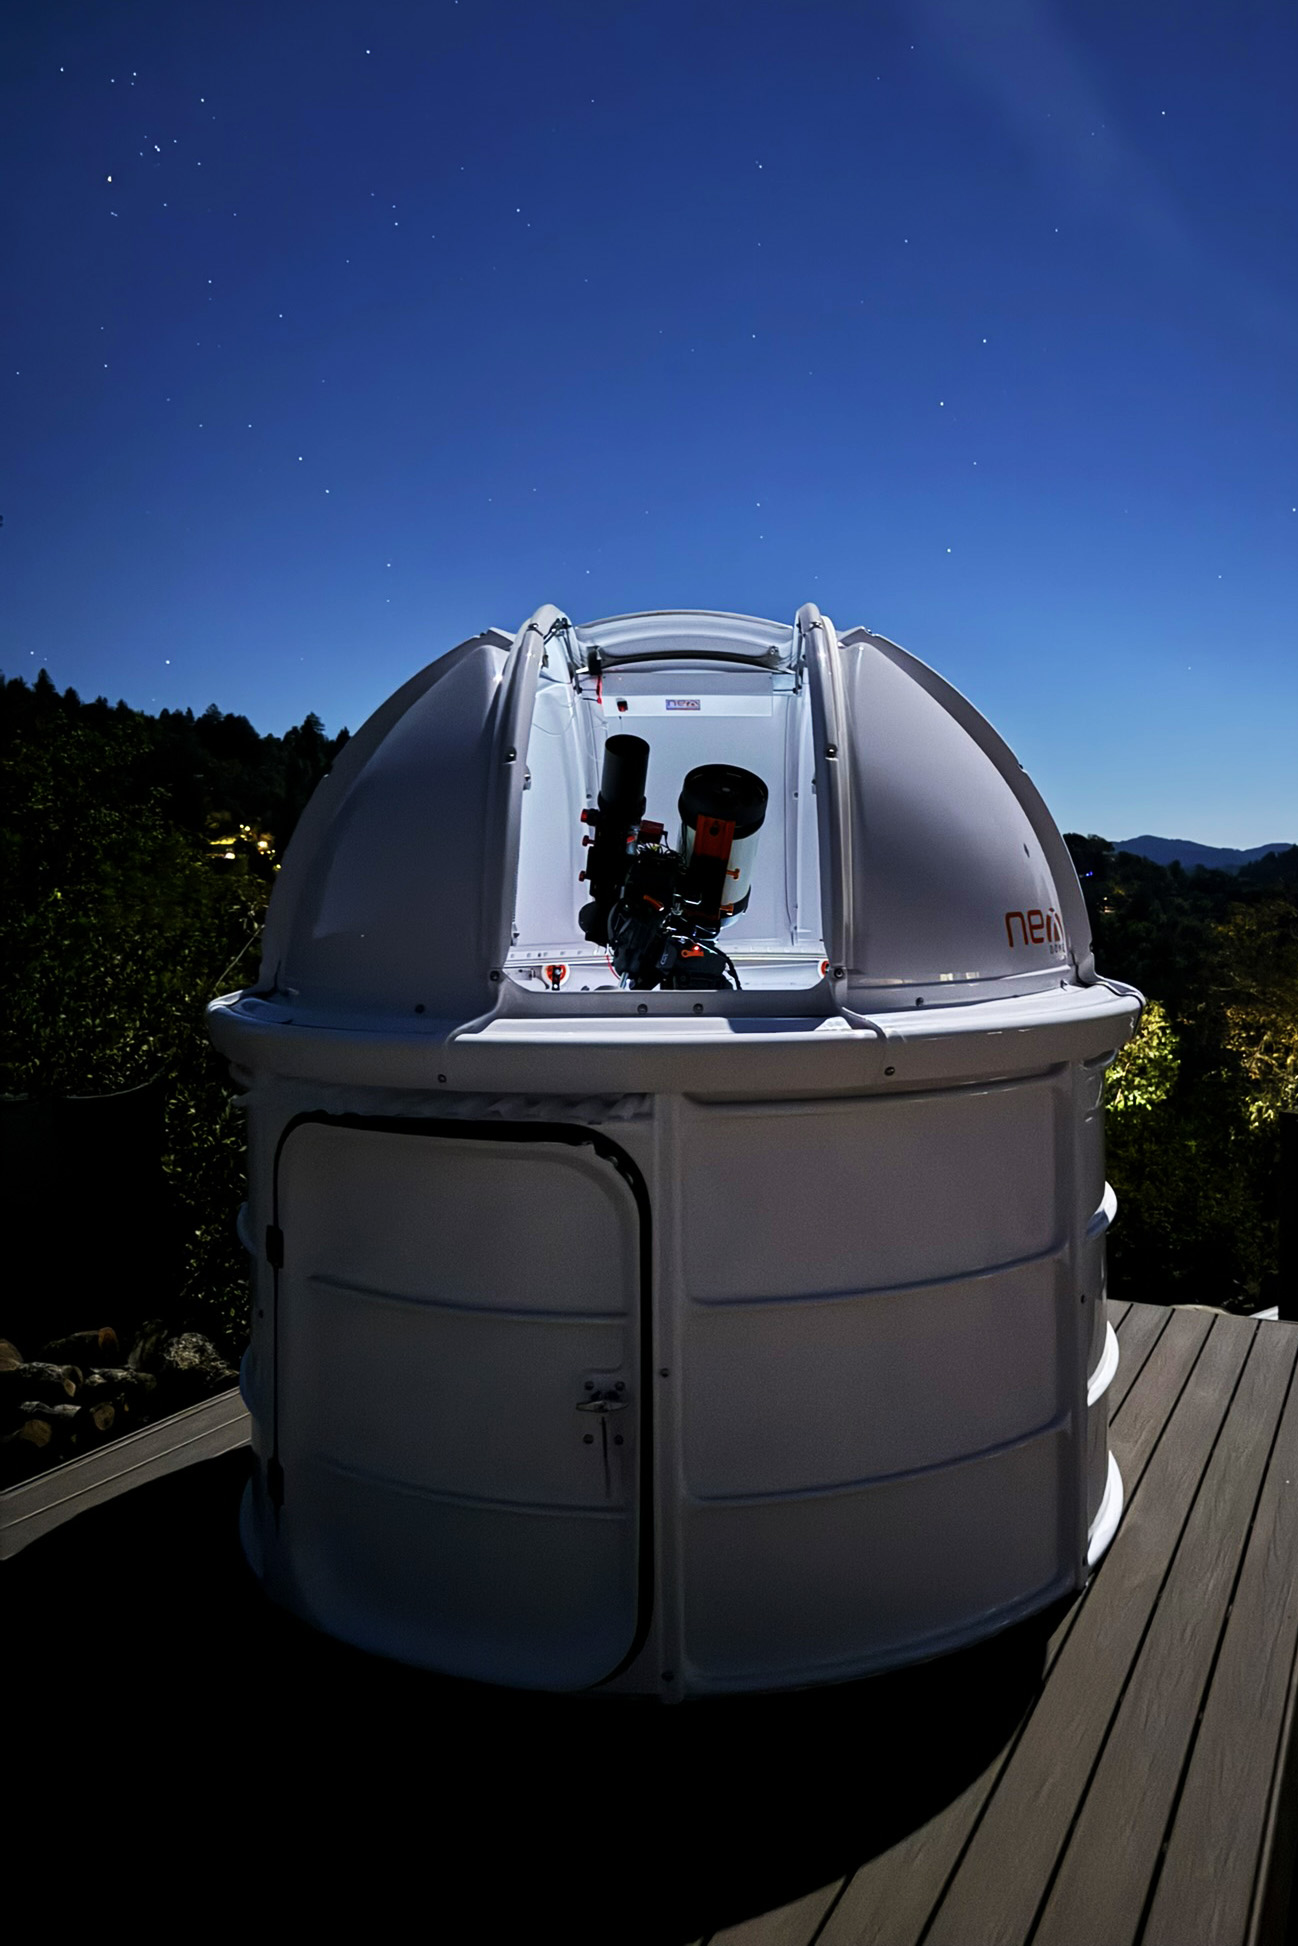
Nexdome Backyard Observatory
Lazy Photons Observatory utilizes a NexDome observatory dome. Featuring a fully automated motorized rotation track and shutter system. Building one of these observatories and and getting it up and running requires dedication and extensive troubleshooting. With patience and some creativity it can be a game changer for an amateur astronomer such as myself! While there are better observatories on the market, most are substantially higher cost so do your research and consider whether you want a turn key solution or are willing to undertake a "project".
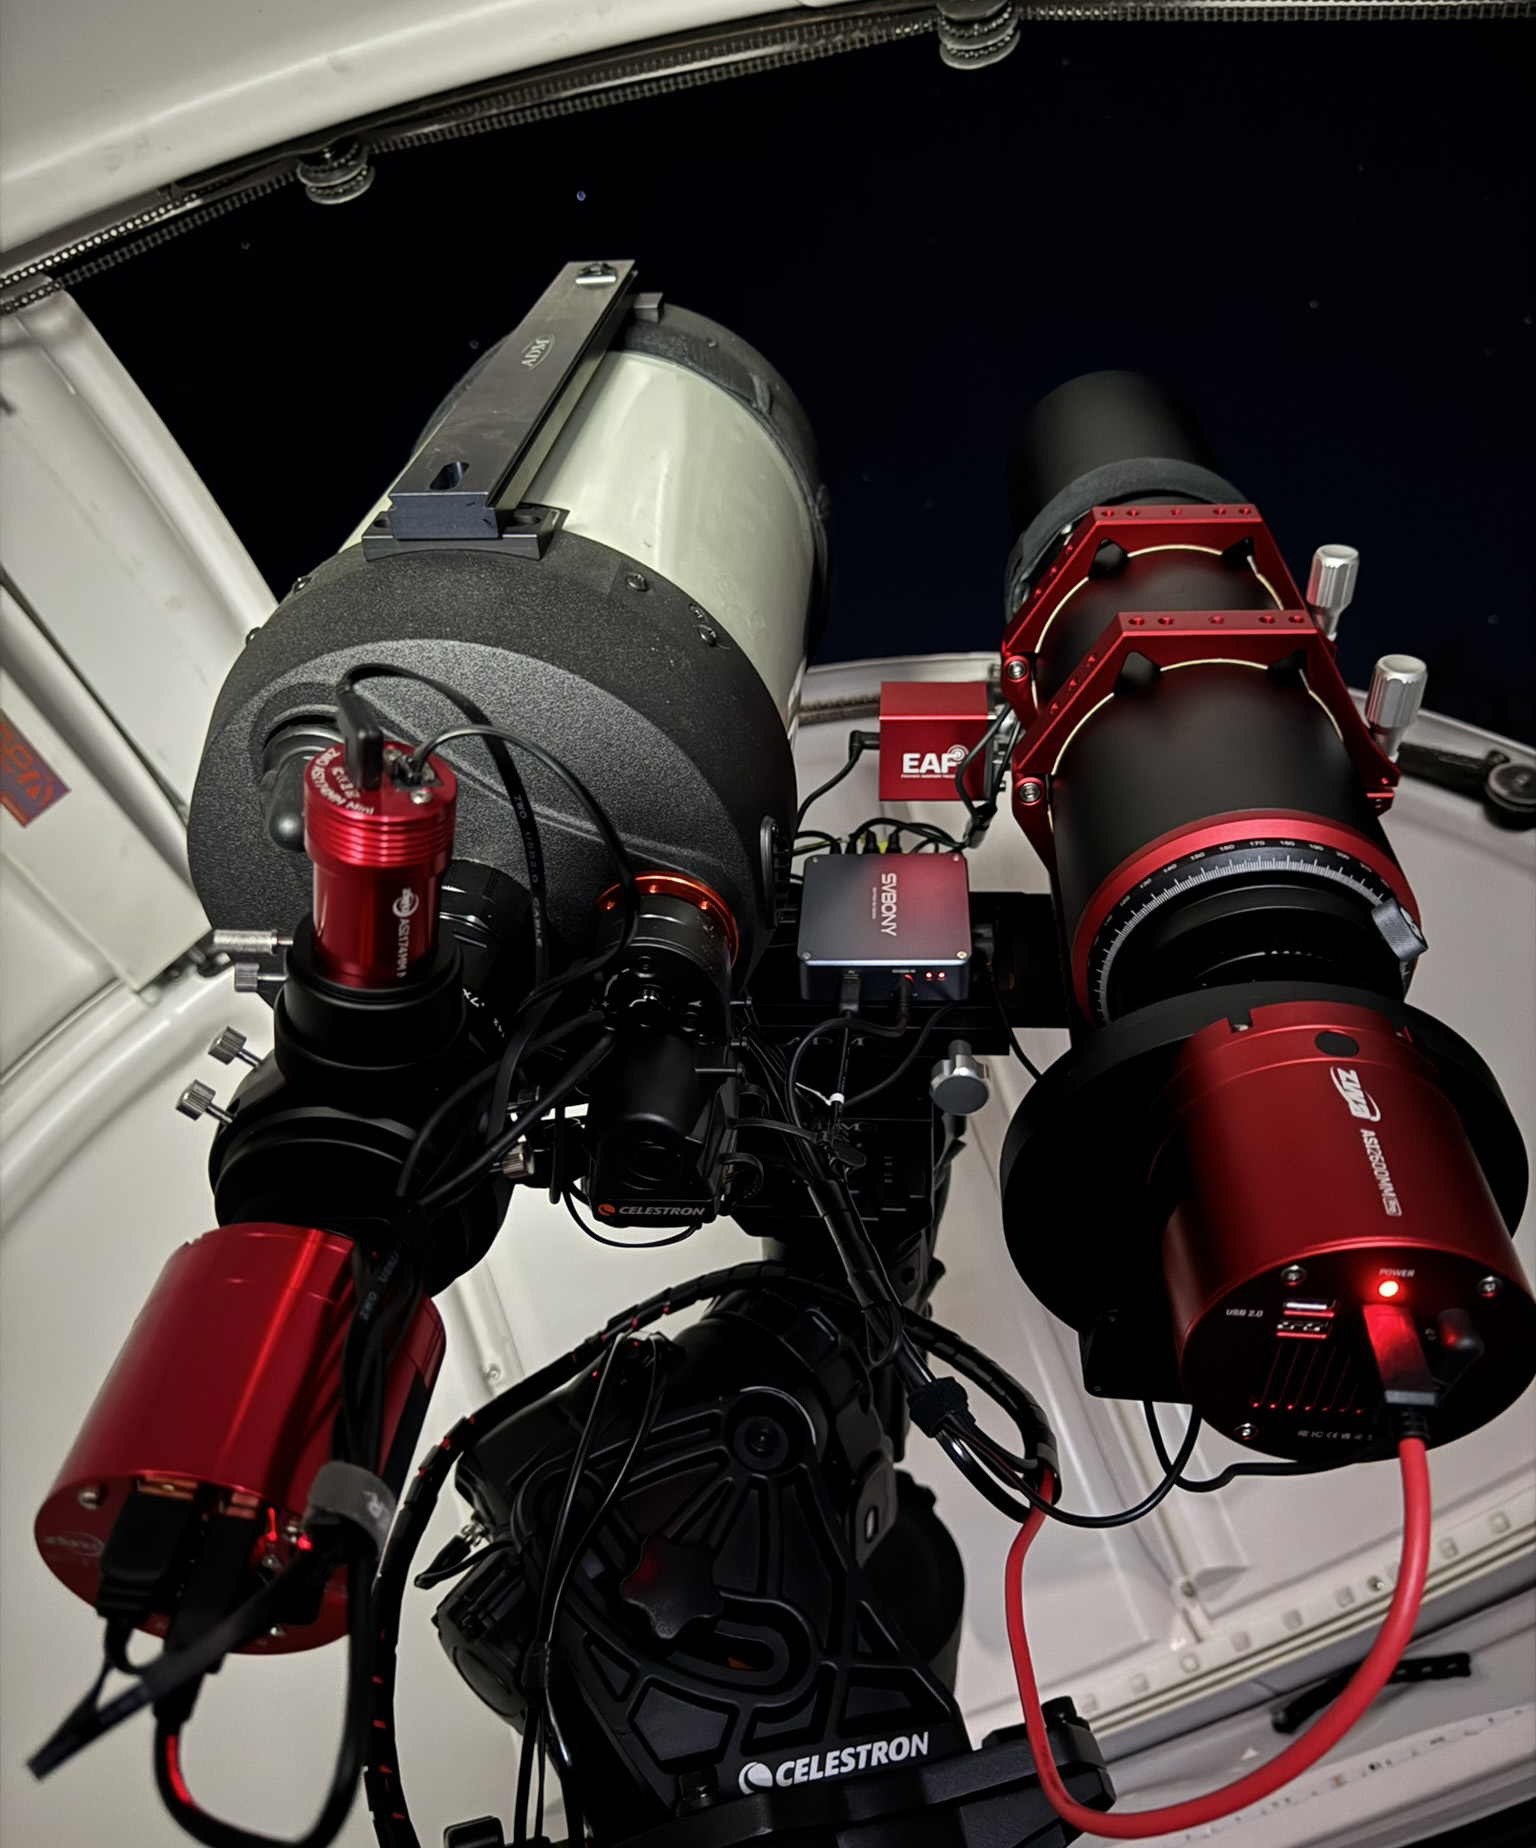
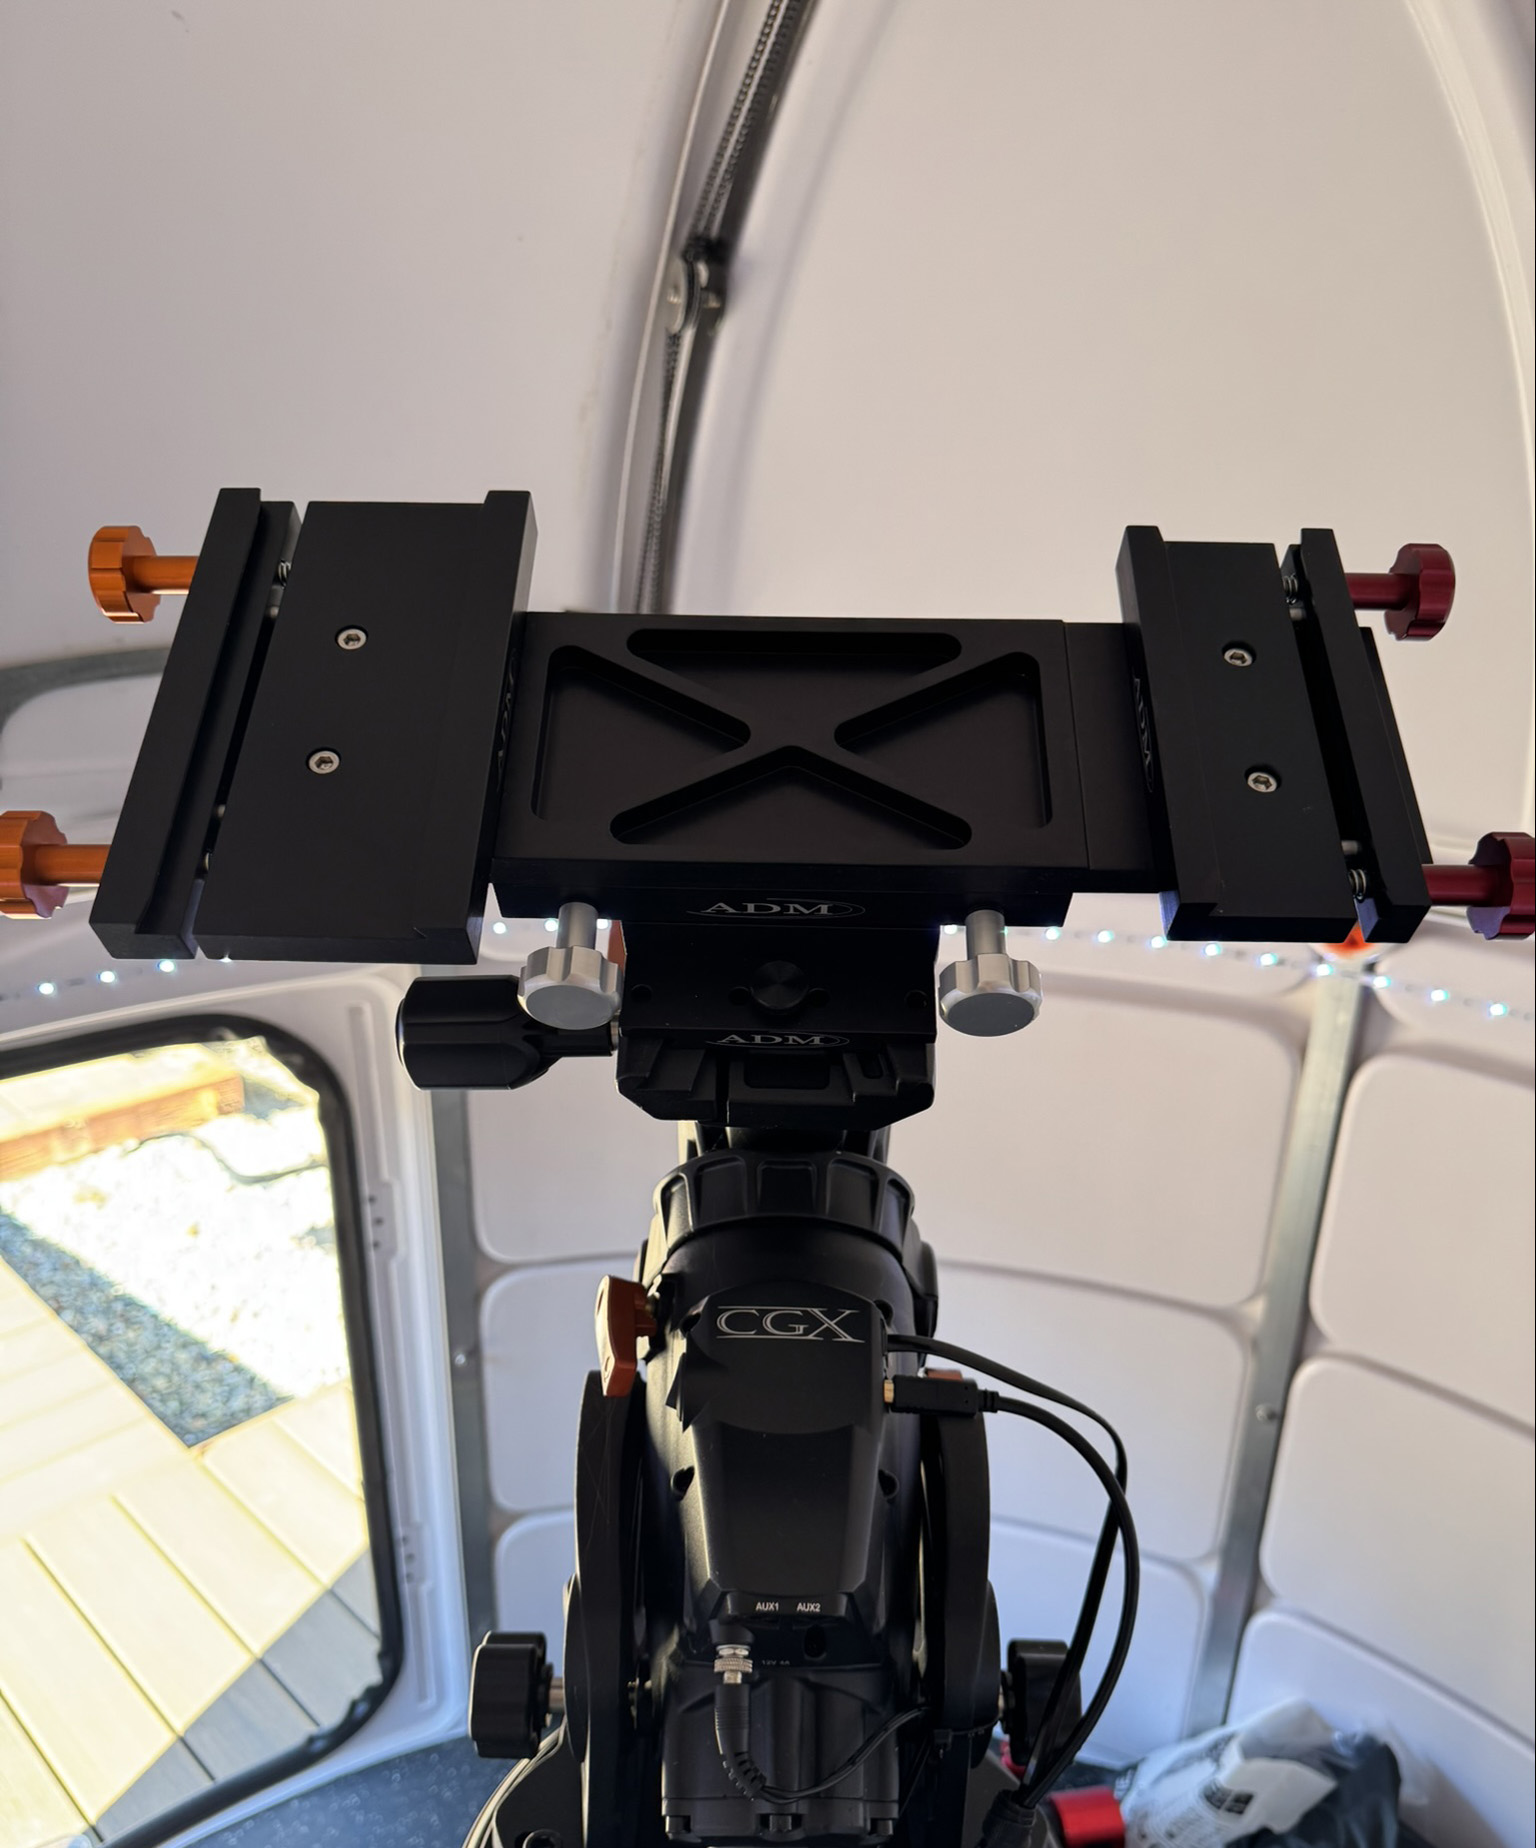
My side-by-side configuration utilizes the ADM DSBS-15CB 15" D-Series Connecting Bar. I am pushing the limits of my CGX mount with a total payload mass of 46 lbs versus the rated 55 lbs, but so far, I have not observed any noticeable degradation in tracking error. This setup allows me to quickly swap between imaging small targets like galaxies on the 8" EdgeHD and wide-field targets like emission nebulae with the Cat 91. I use the EdgeHD with an OAG for guiding both imaging trains.
Equipment Configuration
Telescopes • Cameras • Mount • Guiding| Equipment / Item | Specifications |
|---|---|
|
Imaging Train 1: Celestron EdgeHD 800 (Deep Sky & Galaxies)
|
|
| Main Optical Tube | Celestron EdgeHD 800 • 8" Aplanatic SCT • Native f/10 / 0.7x Reduced f/7 |
| Primary Camera | ZWO ASI294MC Pro (Color) • Micro Four-Thirds 14-bit ADC |
| Autoguiding (Shared) | ZWO OAG-L & ASI174MM Mini Guider • Used to guide both optical trains |
| Focusing | Celestron Focus Motor for SCT |
|
Imaging Train 2: William Optics Cat 91 (Wide-Field)
|
|
| Main Optical Tube | William Optics Cat 91 WIFD • 91mm Petzval Apochromat • f/4.9 |
| Primary Camera | ZWO ASI2600MM Pro (Mono) • APS-C 26MP |
| Optical Filtration | ZWO Filter Wheel • Antlia LRGB-V Series & 3nm Pro SHO Set (36mm unmounted) |
| Focusing | ZWO EAF (Electronic Auto Focuser) |
|
Equatorial Mount & Hardware
|
|
| Equatorial Mount | Celestron CGX Mount • 55 lb payload capacity |
| Saddle / Mounting Hardware | ADM DSBS-15CB 15" D-Series Connecting Bar |
Image Processing Workflow
All procedures utilize PixInsight, which can be purchased for a one time fee and will drastically level up your astro image processing skills! Below is the standard step-by-step processing protocol used at Lazy Photons Observatory.
Required Repositories
Add these repositories in PixInsight via Resources -> Updates -> Manage Repositories:
Stacking Procedure
- Filter bad frames with SubframeSelector
- Example expression:
FWHM < 7.0 && Stars > 100 - Stack with WeightedBatchProcessing
- Load Lights, Flats, Darks, Flat Darks
- Once masterFlat and masterDark images are generated after your first run, they can be loaded and used for all future images with matching properties
- After stacking complete, open
autocrop.xisffor each stacked image - All images that are stacked at the same time will be plated solved, registered and aligned which saves time in future processing steps!
OSC Processing (One-Shot Color)
Basic procedure for processing color images captures with an OSC
Initial Calibration & Stretch
- Temporary Stretching:
Ctrl->STFAutostretchfor an unlinked stretch - Background Extraction: SetiAstro – Automatic DBE – Use Default Settings
- Color Calibration: Use
SpectrophotometricColorCalibration. Select a preview area of background with no stars. Check Region of Interest and “From Preview” select preview
Sharpness & Noise Management
- BlurXterminator: Open
BlurXTerminatorProcess. Default settings. Wow!!!! - Noise Reduction: Open
GraXpert. Uncheck Background Extraction and check Denoising. Click real-time preview and adjust strength as required - Gradient Correction: If a gradient still exists that you cant remove with color adjustments use
GradientCorrection - Final Stretch: Open
SetiAstro->Statistical Stretch. Click Preview Refresh. If image looks blown out, reduce Target Median a bit. Usually 0.15 – 0.25. If colors don’t look correct, unclick Linked Stretch
Star Removal & Recombination
- Remove Stars: Open
StarNet2. Uncheck Linear Data (since we already stretched), check Create starmask - Reduce Bright Spots: Open
HDRMultiscaleTransform. Select “To intensity” and “Lightness mask”. If effect is too strong, increase number of layers to from 7 – 10 - Color Adjustment: Open
CurvesTransformation. Adjust RGB/K to adjust contrast with s-curve. Add luminance mask (ctrl-k to hide red). Adjust Saturation and Colors with CurvesTranformation. Invert mask and adjust background colors with CurvesTranformation. Remove mask. Consider a final round of Noise Reduction at this point - Replace Stars: Open
PixelMath. Try one of these methods, wherestarlessis the Identifier of the image without stars andstar_maskis the identifier of the star mask you created:- Simple: starless + star_mask
- Screen Method: ~((~ starless) * (~star_mask))
- Scaled Screen Method: ~((~ starless) * (~(star_mask * k))) (where k can be adjusted to tune star intensity)
- Final Sharpen: Try one more round of
BlurXterminator, might be surprised!
Mosaic Processing
- Run Background Extraction on both images
- Use
MosaicByCoordinates: Add master files. Select Projection = Mercator for wide field or Gnomonic for narrow field - Linear fit the images: Use
DNALinearFit(see installation instruction below). Select first image as Reference image. Select second image as target view. Use defaults and click ok. Repeat for the remaining images using the same image as the reference image for all - Make sure all images are saved as
.xisf - Use
GradientMergeMosaic: Add all .xisf files from above. Type of combination = Average. Shrink radius = 5. Feather radius = 75. Global apply
C:\Program Files\PixInsight\src\scripts, goto Script->Feature Scripts and select Add and choose above folder, it should find the new script. Click Done.
Monochrome Broadband (LRGB) Processing
Use this procedure to process Broadband LRGB images captured with a monochrome camera. The steps are abbreviated here, see the OSC procedure for more details!
General Steps
Perform the following on each separate LRGB image. To simplify workflow, right click on desktop and select Image Container and drag all images to the container. Then drag triangle of image container to the bottom bar of the processing container.
- Stacking and Image Alignment
- Background extraction
- Blur Xterminator
- Noise Reduction
Channel Combination
We are going to combine the linear data and stretch later.
- Open
LRGB Channel Combination - Drag L image to L channel
- Drag Red image to R channel
- Drag Green image to G channel
- Drag Blue image to B channel
- Click on the apply global
- If you have high quality long integration RGB images you may not need a Luminance (L) channel, in this case use ChannelCombination instead.
Color Calibration and Stretch
- Use
SpectrophotometricColorCalibration - Background extraction (optional)
- Run
HDRMultiscaleTransformto reduce bright spots - Stretch with
SetiAstro->Statistical Stretch - Adjust Colors
- Remove stars
- Adjust colors with CurvesTransformation
- Replace stars with PixelMath
Monochrome SHO Processing
Use this procedure to process Narrowband SHO images captured with a monochrome camera. This procedure also describes the process for integrating RGB stars captured separately with RGB filters. The steps are abbreviated here, see the OSC procedure for more details!
Process SHO Images
- Stacking and Image Alignment – also stack RGB star frames so they are aligned with SHO frames
- Only do the subsequent steps on the SHO images:
- Background Extraction
- Blur Xterminator
- Noise Reduction
- Remove Stars if using RGB Stars
- Select Linear
- Removing stars at this stage can help avoid red star halos that occur if stars are removed after stretching
- Stretch all images (don’t worry about the SHO star mask, it wont be used)
Image Combination Method #1
- Open
LRGB Combination– Combine SHO in Hubble Pallet - Ha to L and G
- OIII to Blue
- SII to Red
- Select Chrominance Noise Reduction
- Apply Globally
- If only doing Ha and OIII: Ha to L and R, OIII to Blue and Green
- NarrowBand Normalization: Select Palette SHO, Preview and adjust Channel Controls as needed
Image Combination Method #2 (my preferred method)
- Open
PixelMath - Uncheck “Use Single RGB/K Expression”
- Create New Image
- Select Color Space = RGB Color
- Use one of the following expressions, experiment with all of them to see the different results! You can also adjust the numbers to tune the relative contribution of each image:
Red (R): (OIII ^ ~OIII) * SII + ~(OIII ^ ~OIII) * Ha
Green (G): ((OIII * Ha) ^ ~(OIII * Ha)) * Ha + ~((OIII * Ha) ^ ~(OIII * Ha)) * OIII
Blue (B): OIII
Red (R): SII
Green (G): Ha
Blue (B): OIII
Red (R): 0.50 * SII + 0.50 * Ha
Green (G): 0.15 * Ha + 0.85 * OIII
Blue (B): OIII
Red (R): 0.75 * Ha + 0.25 * SII
Green (G): 0.40 * Ha + 0.60 * OIII
Blue (B): OIII
Remove the stars – Only if you are using SHO stars!
- Remove stars
- Invert star_mask
- Apply SCNR Green to remove green
- Invert star-mask again
- Rename to SHO_stars
Adjust Colors
- Adjust colors using CurvesTransformation
Prepare RGB Stars – Skip this step if using SHO stars
- Blur Xterminator
- RGB Combination with ChannelCombination
- Use SpectroColor Calibration
- Stretch Image
- Remove Stars to Create RGB_stars
Replace Stars
- Replace stars as usual
- Use SHO_stars if using SHO stars
- Use RGB_stars if using RGB stars
Cuiv Guide
For an excellent overview of image processing in PixInsight, watch Cuiv's guide below:
Observatory Data Archive
Open astrophotography datasets available for community research and post-processing.
About The Raw Archive Files
The ZIP archives contain fully calibrated and registered subframes saved in the standard .xisf format. Master darks and master flats have already been applied, and the frames are star-aligned to a common reference image. They are prepared and ready for immediate image integration.
PixInsight Stacking Guide
- Open the ImageIntegration process.
- Add the extracted
.xisffiles for a single filter channel. - Set Combination to Average and Normalization to Additive with scaling.
- Under Pixel Rejection (1), choose Generalized Extreme Studentized Deviate (GESD).
- Click Apply Global (F6) to generate your master! Repeat for each filter.
Data Licensing & Usage
All raw data and master files are released under the Creative Commons Attribution-NonCommercial-ShareAlike 4.0 International (CC BY-NC-SA 4.0) license. You are free to download, remix, and process these images for non-commercial and educational purposes, provided you give appropriate credit to Lazy Photons Observatory and distribute your contributions under the same license.
| Catalog ID | Version | Target | Captured (MM/DD/YYYY) | Total Integration | Subframes | Processed File | Raw Subframes |
|---|
Nathan Orr
Aerospace Engineer • Amateur Astrophotographer • Lego Enthusiast
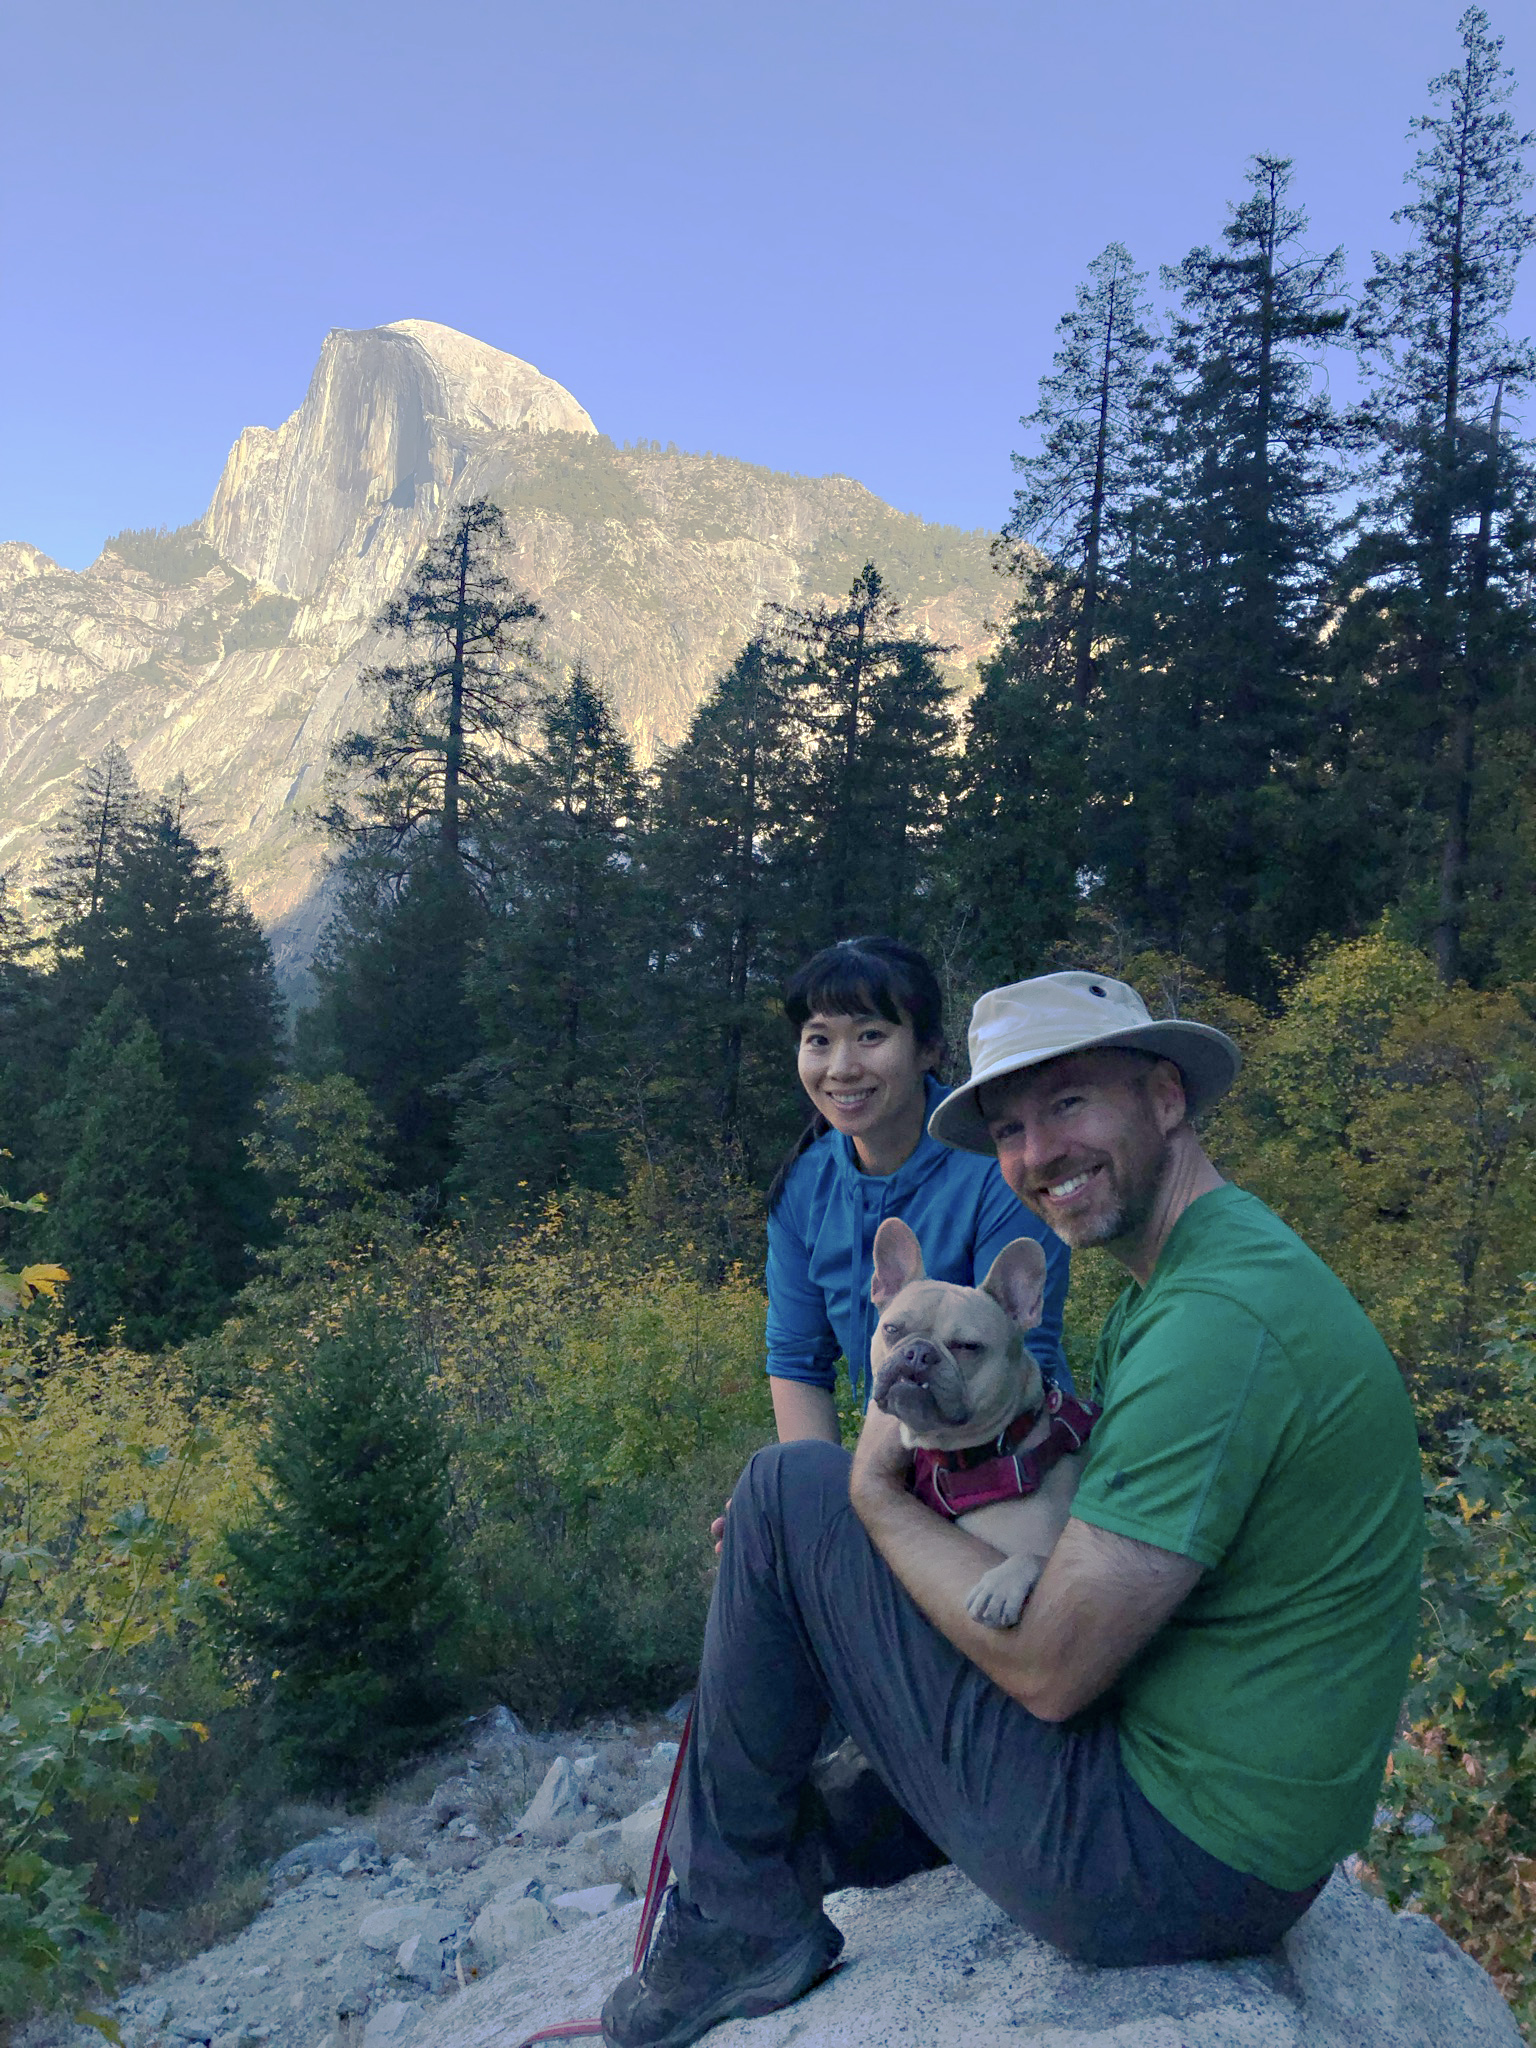
My passion for space and exploration led me to become an Aerospace Engineer, and I have been fortunate to work on several spacecraft and launch vehicle projects. However, the mystery and scale of the cosmos drew me to astrophotography as a way to see what lies beyond our solar system and capture the beauty of the universe.
Lazy Photons Observatory operates under Bortle 5 skies at my home in the mountains of California. I have been slowly refining my skills in astrophotography over the past ten years, constantly trying to improve my art as budget and time allow. The most significant step forward has been the construction of an observatory dome, which allows me to leave my equipment set up, aligned, and ready to capture photons on every clear night. The facility is fully automated using N.I.N.A., and my processing workflow is done entirely in PixInsight.
I believe that science and community thrive on openness. Therefore, all of my full-resolution images alongside registered raw subframes are available for download. If you do attempt to process the data yourself, please let me know—I would love to see the result!
"Let's see what's out there."
Get in Touch
Have a question about my imaging gear, PixInsight workflows, or want to share your processing results of the raw subframes? Reach out below.